
How to turn on two-factor authentication (2FA) on Instagram
Download Authenticator App
-
Before you begin, download Instagram Authenticator App to your device.


Locate Instagram 2FA Settings
-
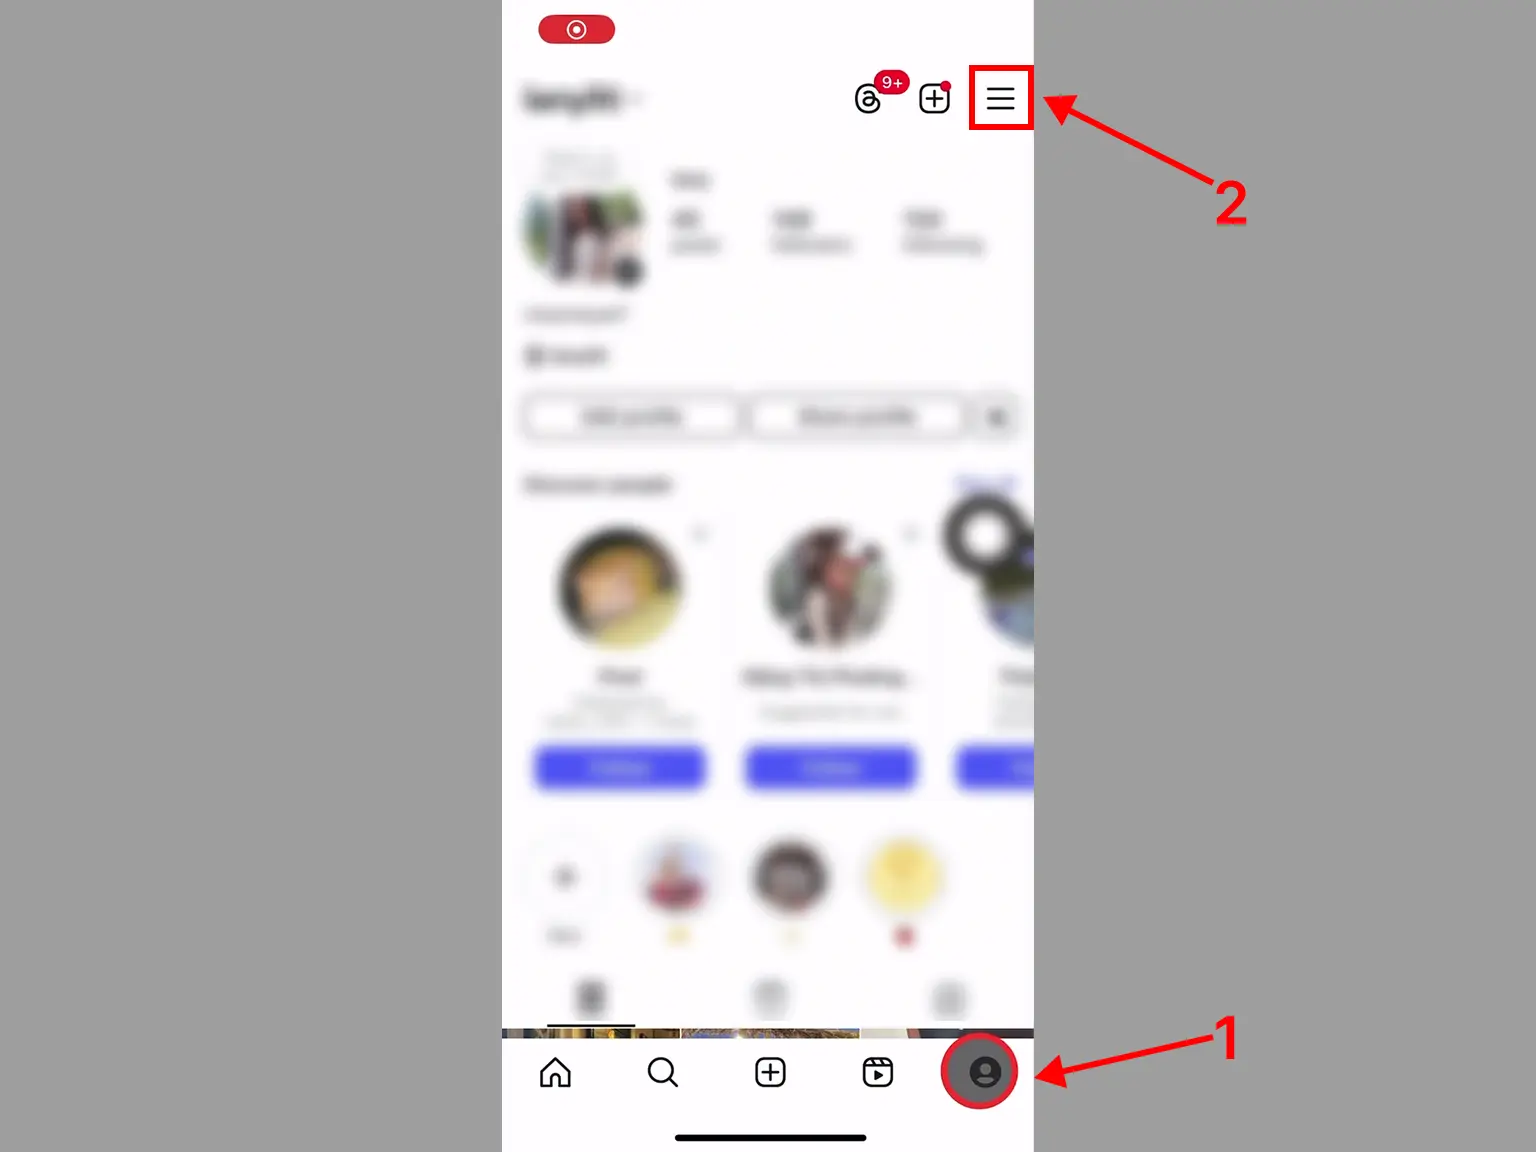
Open your Instagram app on your mobile device. Tap on your profile picture in the bottom right to go to your profile, then tap (3 bars icon) in the top right.
Password and Security
-
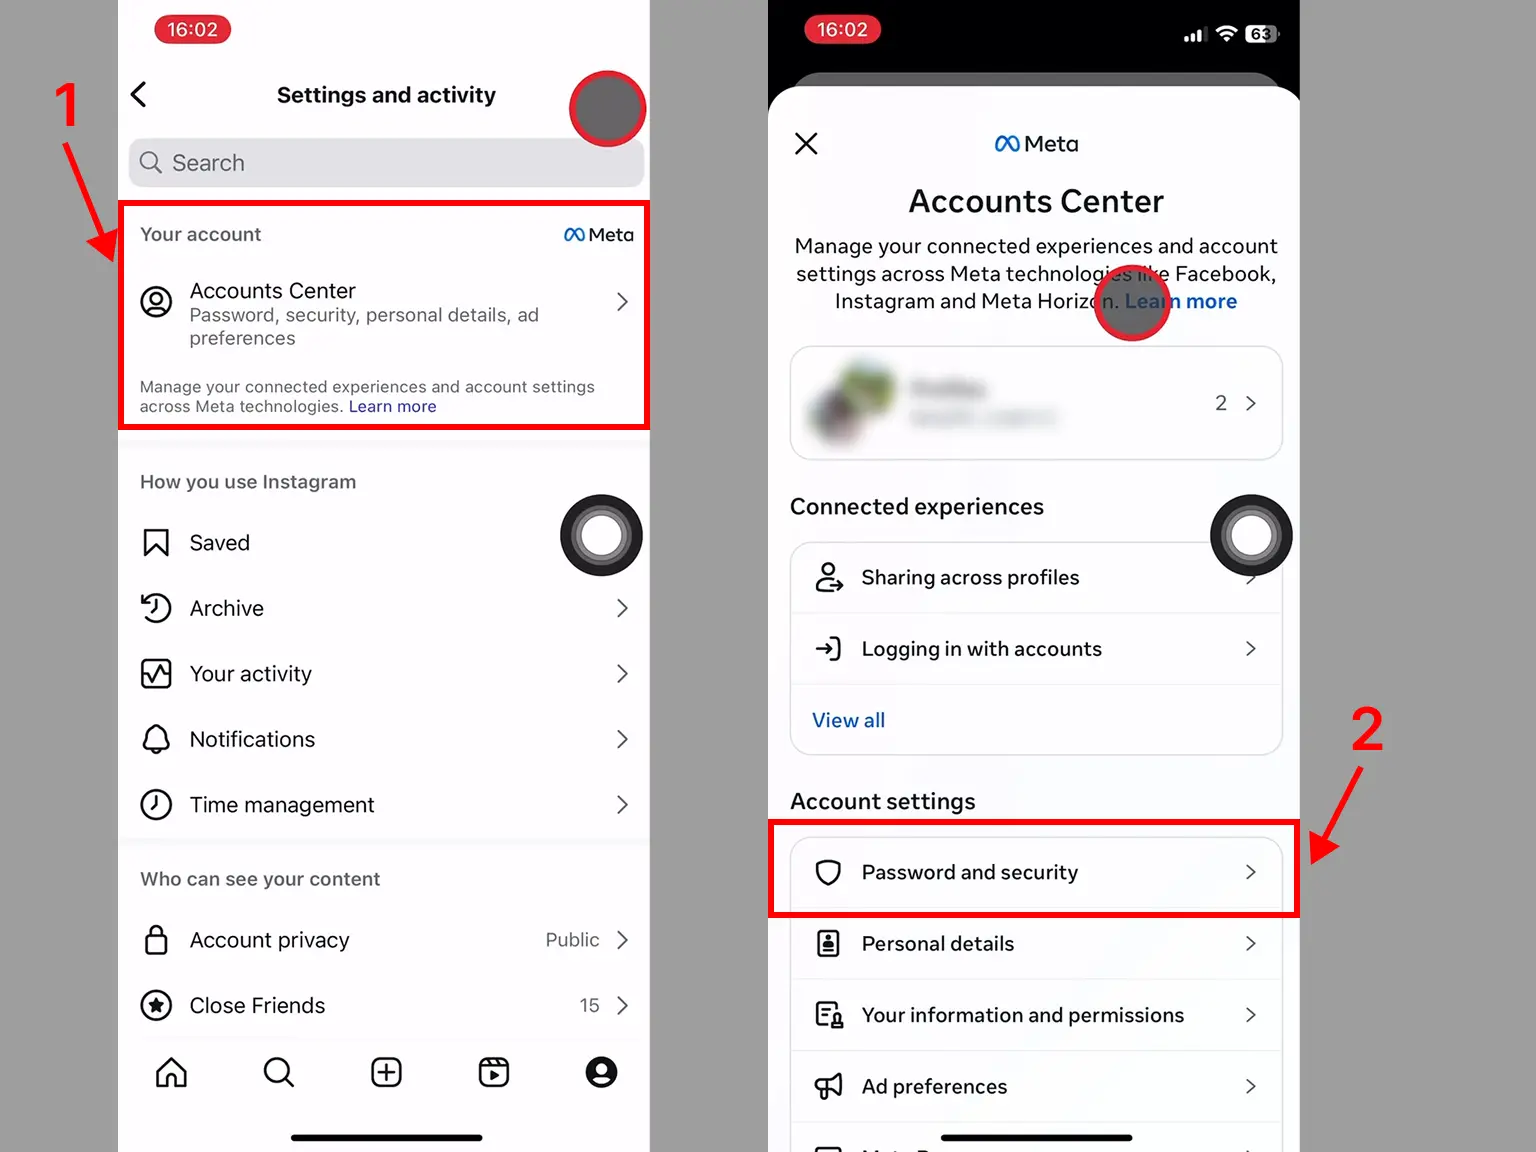
Click Account Center, then click Password and Security
Set up Two-Factor Authentication
-
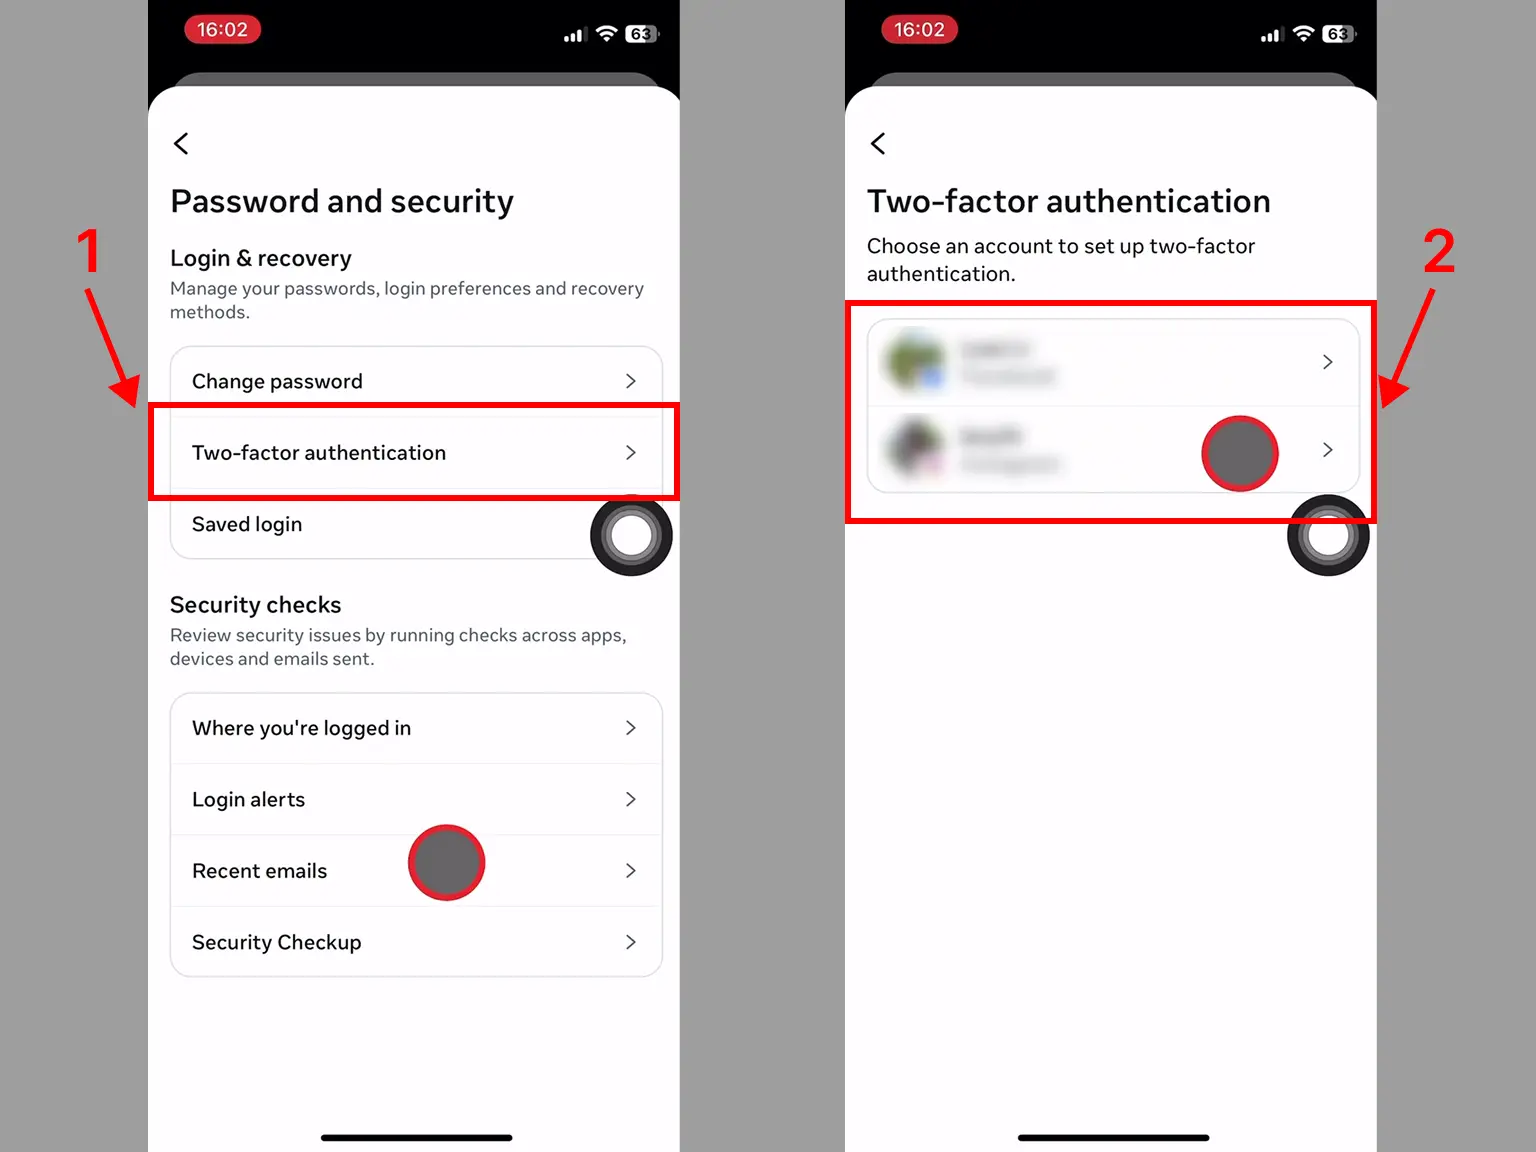
In Password and Security, choose Two-Factor Authentication, then click the account you want to secure.
Turn on Two-Factor Authentication
-
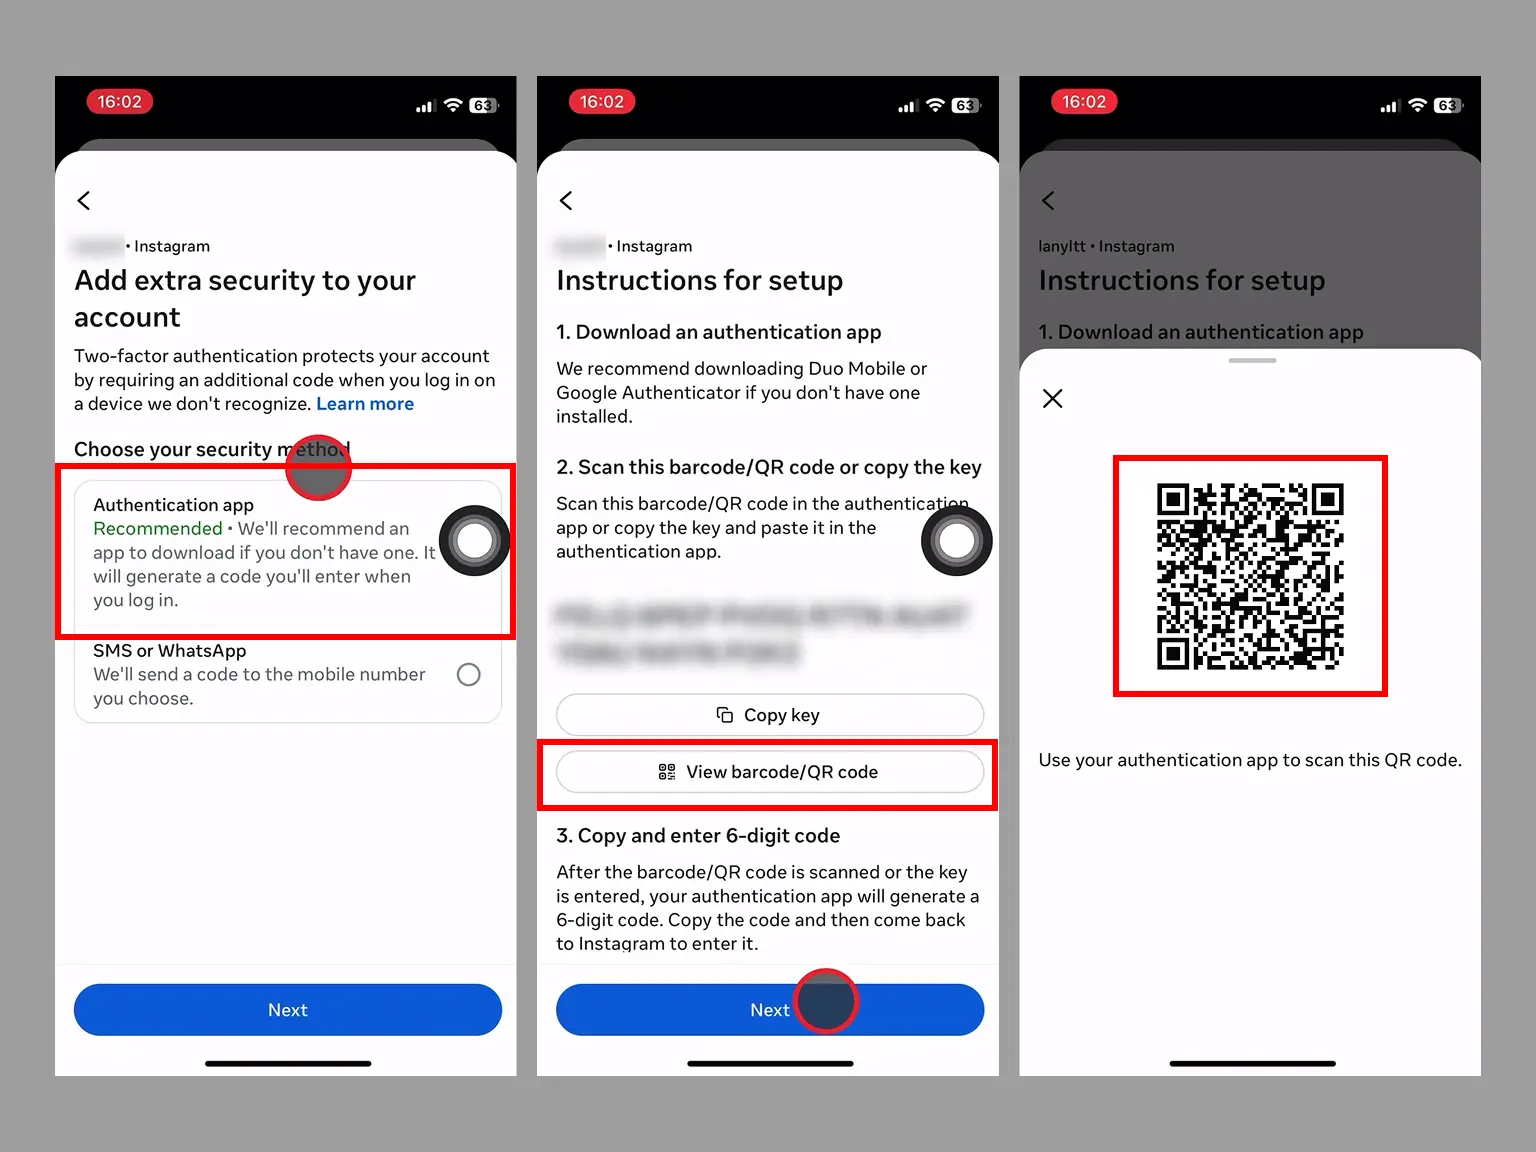
You'll need to choose your security method. Select the Authentication app. Then choose View barcode/QR code, then choose Next.
Two-Factor Authentication Code (2FA)
-
Open Authenticator App : Scan & 2FA. Then, click on "Scan QR" or the plus button
 at the bottom of the
screen. You can also click on the Card, as shown in the picture. After clicking, bring your phone up
to Scan QR Code!
at the bottom of the
screen. You can also click on the Card, as shown in the picture. After clicking, bring your phone up
to Scan QR Code! 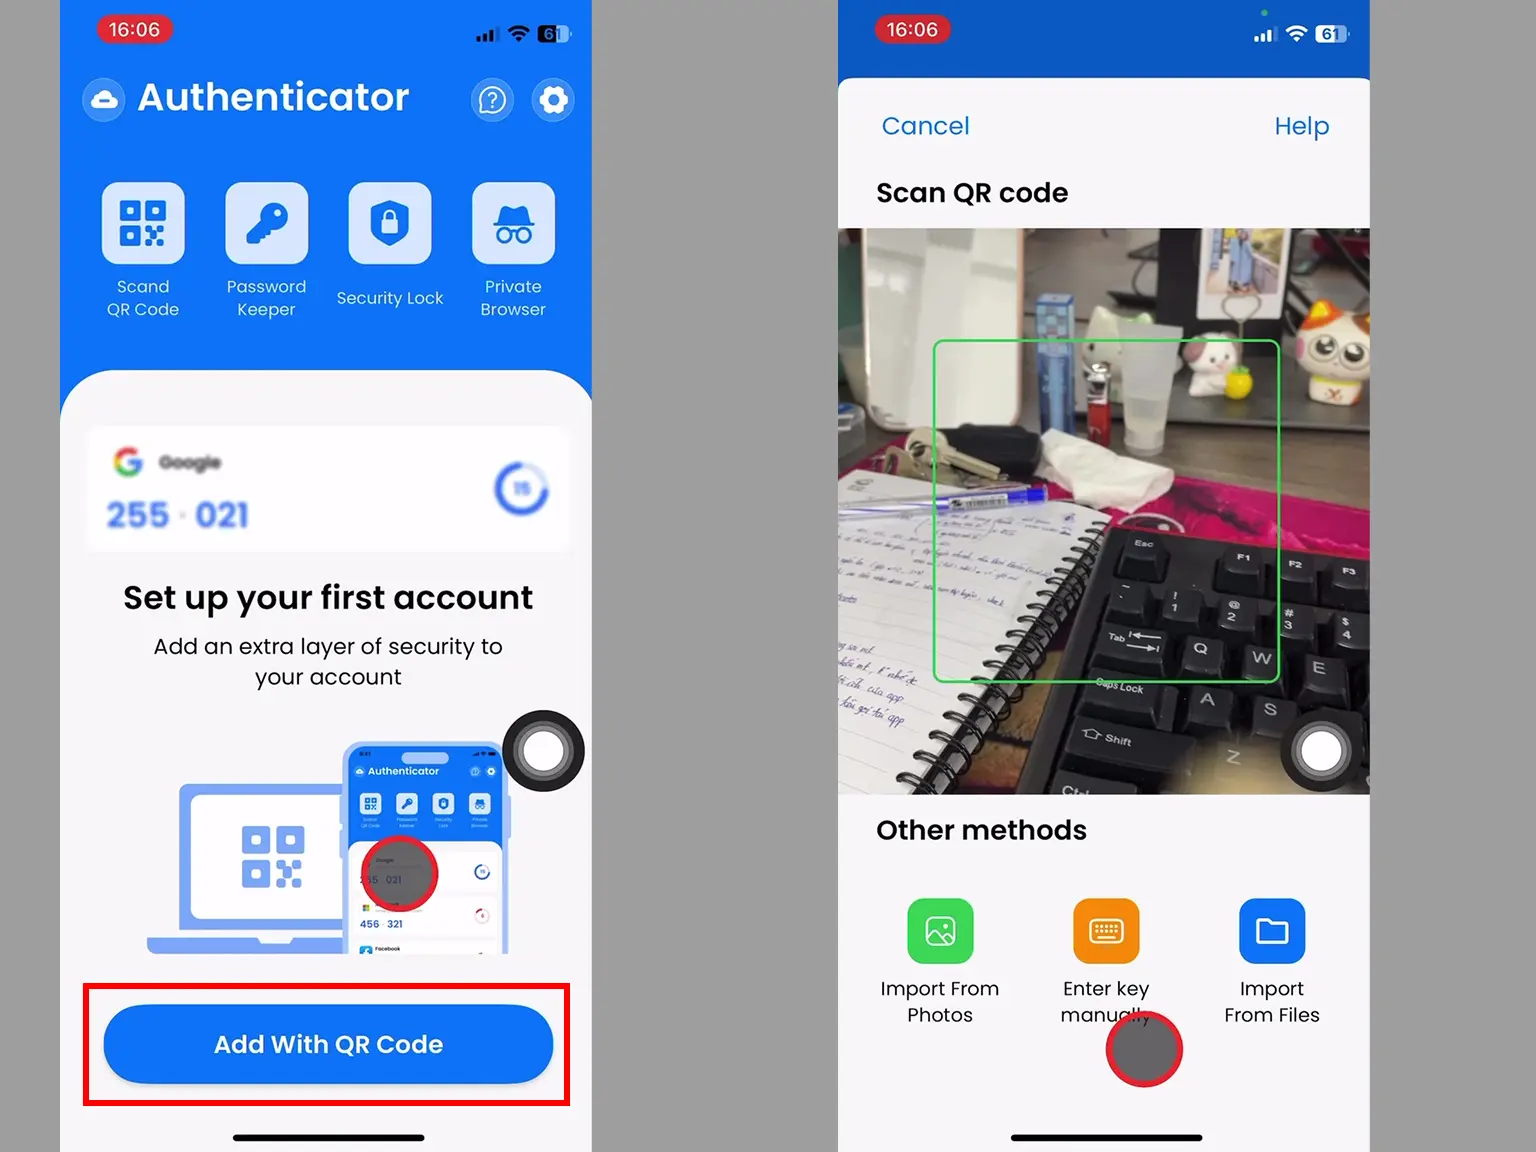
Verify Your Code
-
When the scan is successful, the 2FA Code will be displayed.
Copy the numerical code provided from the Authenticator App and confirm it on the Instagram app, and then click Next.
Note: this code refreshes every 30 seconds.
You have successfully enabled 2FA Authentication.
You're all set! You've enabled Two-Factor Authentication (2FA) for your Instagram account. To learn more, visit the Instagram support page. Stay safe!
Was this article helpful?